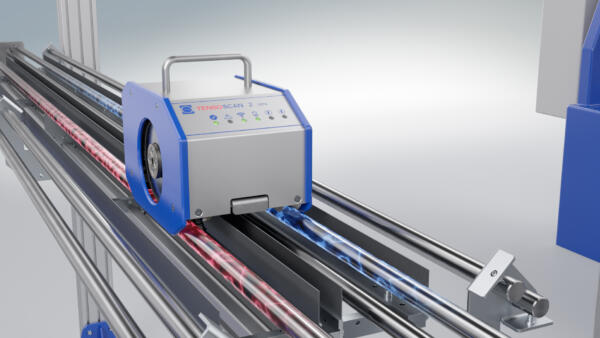
Monitoring of Thread Tension
The TENSOSCAN 2 5374 performs continuous automatic monitoring of the tension of each individual thread of a yarn sheet. A measuring head travels across the entire width of the yarn sheet, measuring the tension of the threads at a speed of 2 metres per minute. Thanks to the wireless design and the universal measuring sensor, which is suitable for all yarn types, with TENSOSCAN 2 you can move the measuring carriage from one Warping machine to another for the very first time. This is advantageous if the thread tension is to be measured only when the machine is started up or if the measuring carriage is to remain on the same Warping machine only for a limited period of time.
- Reliable monitoring of the tension of each thread of a yarn sheet
- Fast and reliable detection of threads with tension that is outside the pre-set limits
- Wireless design – one measuring carriage can be used on several Warping machines

Features

Tried-and-tested measuring principle
The ceramic-coated measuring sensor glides across the threads in an extremely gentle manner, thus preventing any damage to the yarn material. The yarn sheet is guided tangentially, i.e. without additional friction, between the guide rods. The universal sensor in the measuring head scans the threads one by one to determine the thread tension.

Quality assurance
Quality assurance is provided by the automatic recording and archiving of the measured values for each beam. The long-term measurement evaluation relates to one beam, i.e. the measurement starts automatically when warping a new beam and ends with the finishing of this beam. For each thread you can read off the average value as well as the smallest and the largest measured value detected during this period of time. All measurement data related to each order and beam is automatically stored as such in an archive.

Optional shutdown of the machine if thread tension is outside the tolerance range
The TENSOSCAN 2 control unit is connected to the Warping machine’s shut-off device and can thus stop the machine if a thread tension that is too high or too low is detected. Measurement values outside the customer-defined limits are shown in red in the thread tension diagram on the control unit screen. The thread numbers of threads with tension that is too high or too low can be traced quickly by zooming into the bar chart. The operating parameters are entered directly into the control unit using a wear-resistant membrane keypad. The menu is easy to operate thanks to its self-explanatory user interface and various user languages can be selected.

Access to the measurement data from anywhere
A WiFi module is integrated into the control unit. The operator has the choice of accessing the TENSOSCAN 2 quickly and easily via smartphone, tablet or laptop. The integrated web server offers a comprehensive user interface for all aspects of the TENSOSCAN 2.

Prerequisites for installation
The operational principle of the TENSOSCAN 2 requires a yarn sheet to be fed in parallel on one level. lf this prerequisite is not met, additional reeds and guide rods can be supplied as accessories. These accessories are installed directly on the TENSOSCAN 2 inspection bed.
Product tour


| Description | Value |
|---|---|
| Working width: | Up to 84" |
| Gauge: | Up to E36 |
| Measuring range: | 5 cN … 1,000 cN |
Submit your data and you will be contacted by one of our experts
